If hiring a professional photographer is not within your budget but you need images for your social media platforms, not to worry. With just a few simple items, you can create gorgeous photos easily right within your own home. And these days with all of us sheltering in place due to the Corona Virus, now is a good time to give it a try. The 4 things you’ll need to get started are: a background (wood coffee table, beautiful tile floor in your bathroom, kitchen island), good light (ideally a big window near your surface or a background that you can take to the window), the items you want to photograph, and a foam board to bounce light.
Once you have all these items, just follow these easy steps:
-
- When gathering the items you want to photograph. Think in terms of layers. What are other supporting elements you can bring in that relate to the subject.
- Think about your background surface. A piece of white foam core is always great (or I purchased a faux marble backdrop from a company called medium).
- Set up your area to take photo near a large window so that you have soft natural light. A cloudy day is always great. If bright sun is streaming in try and soften it with light curtains or wait until the sun is not so bright….notice the hours of the day that you have soft light and photograph then.
- Arrange your items in an appealing way. Think in terms of odd numbers and layers. Also try an pull in colors that relate to the main subject.
- Use a foam board to bounce light and fill the shadows. It is amazing how a foam board can transform your image with light. Just an inexpensive dollar store white foam board will do or a tri-fold (like when your kids did projects back in the day).
- When taking your photos, shoot from varying perspectives. Shoot from above and differing angles for interest. Move things around to get different layouts and visual styles.
Taking your own stock photos is great when you are on a budget or in a pinch. The more you practice, the better you will become.
Below are a few behind the scenes images I captured of a layout I was photographing. You’ll see how I used a foam board to bounce light to fill the shadows on the image.
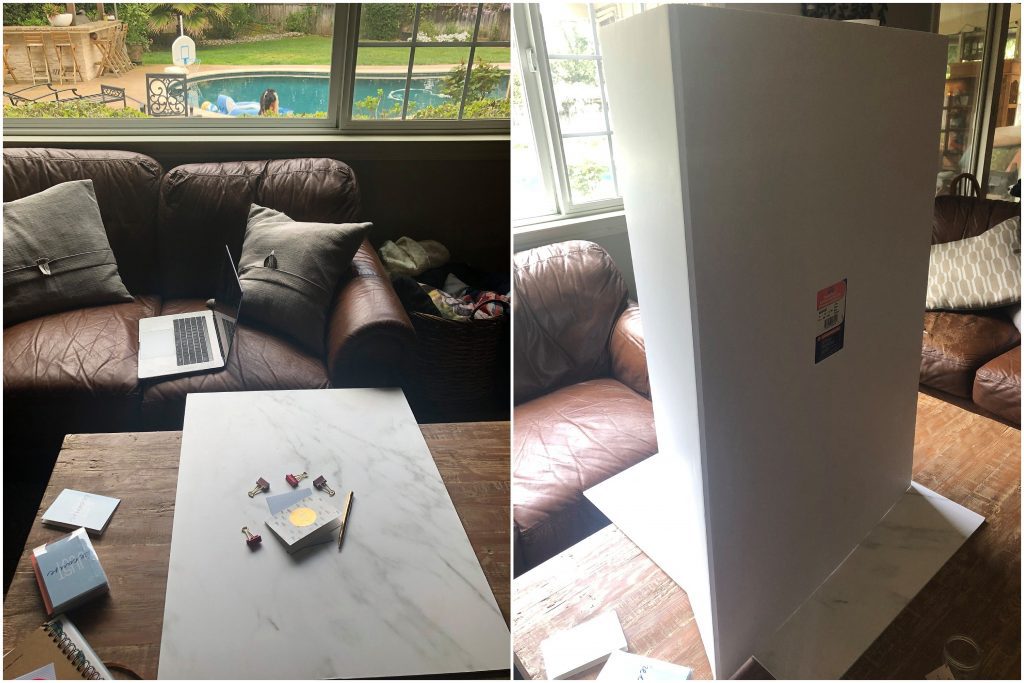
Before picture. This is the image without the foam board to bounce light.

After: By adding the foam board, I was able to bounce light onto my subject and brighten the image.
 If you have any questions on how to create your own DIY stock photos, please don’t hesitate to reach out to me at hello@kristinarustphotography.com.


